Tutorial
Notice: Please have a look at the terminologies if you haven't yet.
After the installation, operators can interact with Cello through dashboard.
By default, the dashboard will listen on port 8080 at the Master Node.
Add a host to the pool
The first time you start Cello, there will be no hosts in the pool. There are two methods to add more hosts into the pool.
- Through the
Overviewpage: Click the+button after theWorking Hostkeyword; - Through the
Hostspage: Click theAdd Hostbutton at the top right corner.
Then you will see a jumped-out dialog to input the setup info.
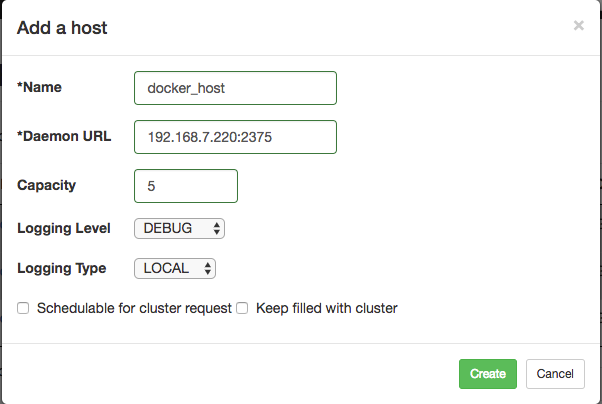
Suppose it's a Native Docker server to import as a host, input those fields
- Name: docker_host
- Daemon URL:
192.168.7.220:2375(replace this with ur docker host address) - Capacity: 5
After successful adding, you can find the docker_host shown in the Host page, with 0 chains and Cap is 5.
Create a chain in the pool
Now we have the free host in the pool, new chains can be create.
Open the Active Chain page, it should be empty now, click the Add Chain button on the top right corner, input those fields:
- Name: test_chain
And select the host with the docker_host.
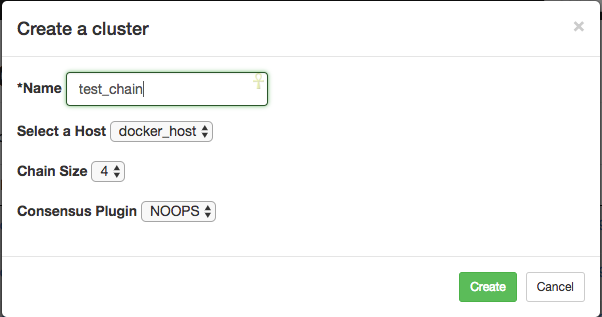
Click the create button to add a new chain with name test_chain into the pool.
Then you can see it at the Active Chain page.
Use auto-mode to provision chains
It will be difficult if you have numbers of chains to create manually. Cello provides automatic ways to save the time.
- Use the host action dropdown menu: The Fillup button will fill the host full with chains till its capacity, while the Clean button will clean all unused chains from the host.
- Use the Autofill checkbox: In the host configuration, you can find a
Autofillcheckbox, which will automatically watch the host and keep it's full with chains to the capacity.
Try these methods as you like.
If you want to know more advanced operational skills, please continue to the Dashboard.

This work is licensed under a Creative Commons Attribution 4.0 International License.